Table of Contents
- Key Takeaways
- Feeling Overwhelmed by GitHub Actions? Here’s What It Really Is
- Breaking Down the Jargon: Core Concepts Explained Simply
- Workflows: Your Automated Recipe
- Events: The ‘Go’ Signal for Your Recipe
- Jobs & Steps: The Individual Instructions
- Actions: Reusable, Pre-built Code Blocks
- Runners: The Computer That Does the Work
- The ‘Aha!’ Moment: What Can You Actually Automate?
- Key Benefits of GitHub Actions (Especially for Beginners)
- Your First ‘Hello World’: A Step-by-Step Guide to Your First Workflow
- Step 1: Creating Your First Workflow File in GitHub
- Step 2: Understanding the Basic YAML Structure (It’s Simpler Than It Looks)
- Step 3: Writing Your ‘Hello World’ Action
- Step 4: Committing the File and Watching the Magic Happen
- GitHub Actions Pricing: What You Need to Know
- The Free Tier: Generous for Learning and Public Projects
- Paid Plans for Private Repositories: A Quick Overview
- GitHub Actions FAQ for Beginners
- Conclusion: Your Next Steps in Automation
Key Takeaways
-
What it is: GitHub Actions is a powerful automation tool built directly into GitHub that lets you automate your software development tasks, like testing and deploying code, right from your repository.
-
How it works: You create “workflows” (automated recipes) using simple text files. These workflows are triggered by “events” (like pushing code) and run on computers called “runners.”
-
Why it matters for beginners: It helps you learn professional development practices (CI/CD), saves time by automating repetitive tasks, and has a generous free tier, making it perfect for learning and personal projects.
-
Your first step: You can create a simple “Hello World” workflow in minutes by adding a special YAML file to your repository, proving that getting started is easier than it seems.
Feeling Overwhelmed by GitHub Actions? Here’s What It Really Is
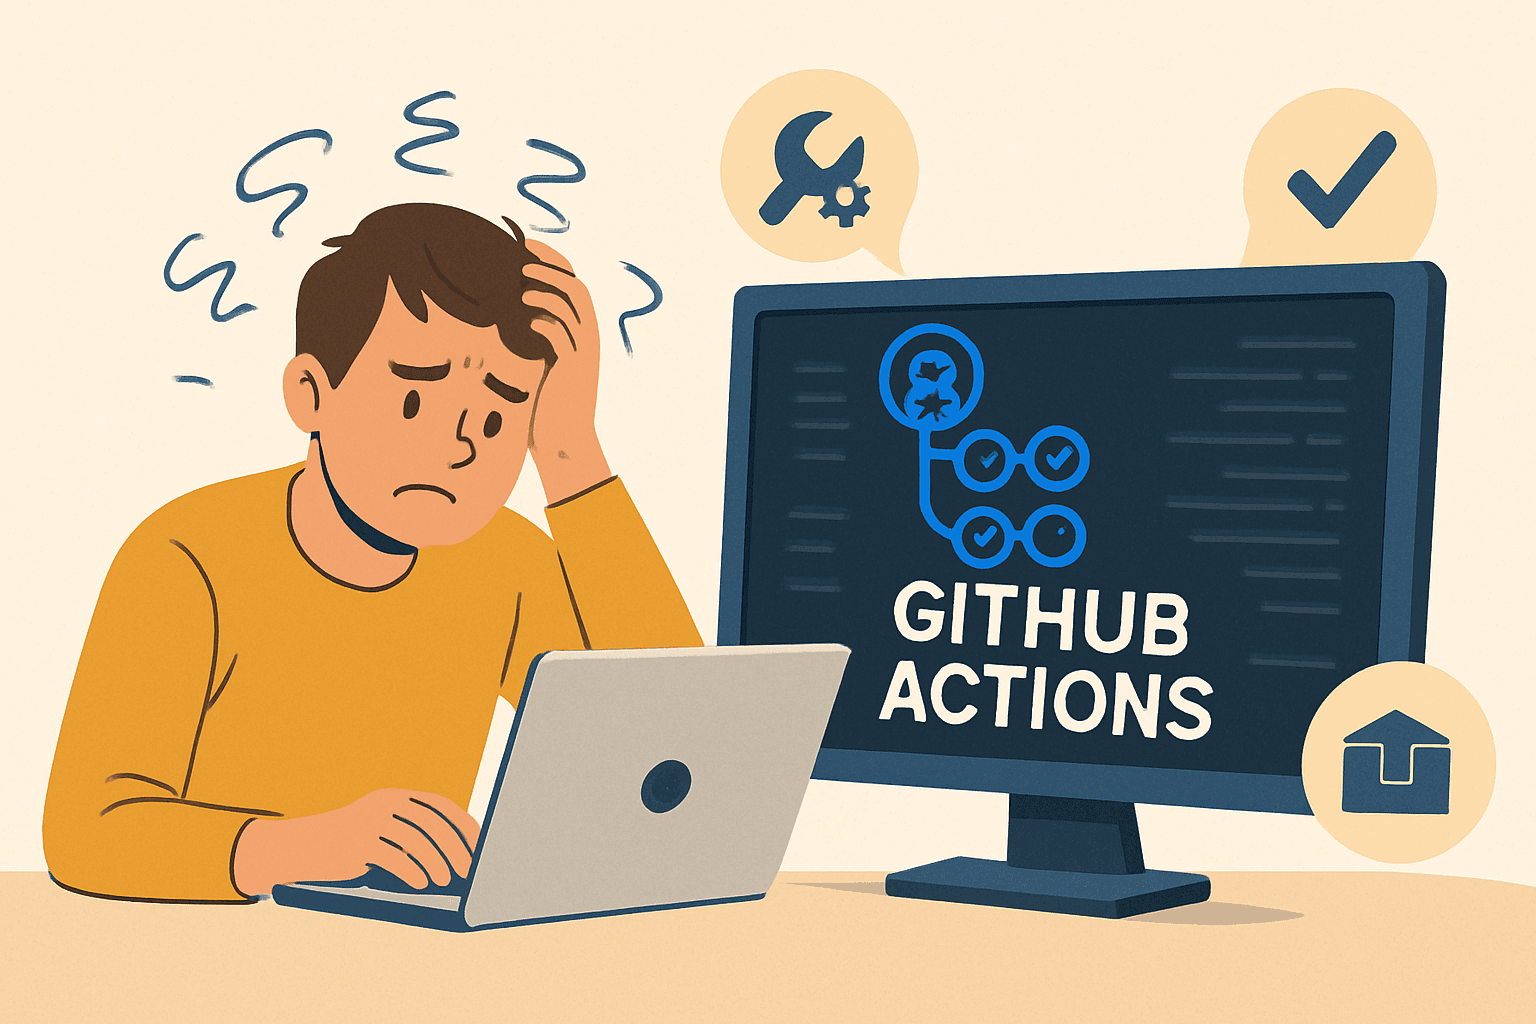
If you’ve seen “GitHub Actions” pop up in job descriptions, team meetings, or tech articles and felt a wave of confusion, you’re not alone. It sounds complex, technical, and maybe even a little intimidating. But what if I told you it’s just a fancy way of saying “let the computer do the boring stuff for you”? At its core, GitHub Actions is an incredibly powerful automation tool built right into the GitHub platform you already use. It’s designed to take over the repetitive, manual tasks in your development process so you can focus on what really matters: writing code and solving problems. Think of it as your personal, tireless assistant who lives inside your repository, ready to spring into action whenever you tell it to. This guide is here to demystify the jargon and show you how to get started.
Breaking Down the Jargon: Core Concepts Explained Simply
The biggest hurdle for any beginner is the terminology. It sounds like a foreign language, but once you understand a few key concepts, everything starts to click into place. If you’re new to this, let’s break down the basics together. We’ll use a simple analogy: baking a cake. This will help you grasp what each piece of the GitHub Actions puzzle does, making the whole system feel much more approachable and logical.
Workflows: Your Automated Recipe
A workflow is the entire automated process from start to finish. Think of it as your complete recipe for a cake. It’s a single file you add to your project that defines everything that needs to happen. It lists all the ingredients (code), the instructions (steps), and, most importantly, what should kick off the baking process in the first place.
Events: The ‘Go’ Signal for Your Recipe
An event is the specific trigger that starts your workflow. It’s the “go” signal. In our cake analogy, the event might be “a guest rings the doorbell,” which tells you it’s time to start baking. In GitHub, a common event is a push (when you upload new code) or a pull_request (when someone suggests a change). You decide which events start your automated recipe.
Jobs & Steps: The Individual Instructions
A workflow is made up of one or more jobs, which are like major stages in your recipe (e.g., “Bake the Cake,” “Make the Frosting”). Each job is then broken down into individual steps. A step is a single command or action, like “preheat the oven,” “mix the flour and sugar,” or “run the tests.” These are the granular, sequential instructions that get the work done.
Actions: Reusable, Pre-built Code Blocks
An action is a pre-packaged, reusable command that you can plug into your workflow steps. Think of it as a pre-made cake mix or a jar of frosting. Instead of writing the instructions to “check out your code” from scratch, you can just use the official actions/checkout action. The GitHub Marketplace is full of these, saving you immense amounts of time.
Runners: The Computer That Does the Work
A runner is simply the server—the computer—that executes your workflow. It’s the kitchen where you do all your baking. GitHub provides runners for you (with Linux, Windows, and macOS environments), so you don’t have to worry about setting up your own machine. When your workflow is triggered, GitHub spins up a fresh runner, it follows your recipe (workflow), and then it’s discarded.
The ‘Aha!’ Moment: What Can You Actually Automate?
Okay, the concepts make sense, but what does this mean for you? What can you actually do with GitHub Actions? This is where the “aha!” moment happens. You can automate almost any task related to your code repository. For a beginner, this is incredibly powerful for establishing good habits early.
Imagine you push a new commit to your project. Automatically, a GitHub Actions workflow could:
-
Run Tests: Check your code for any bugs or errors before it gets merged.
-
Check Formatting: Ensure your code style is consistent with the project’s standards (a process called “linting”).
-
Build Your Project: If you’re working on a website, it could compile your code into the final HTML, CSS, and JavaScript files.
-
Send Notifications: Post a message to a Slack or Discord channel letting your team know a new version is ready for review.
Essentially, any command you would normally type into your terminal can be automated with a step in a workflow. This is the foundation of Continuous Integration/Continuous Delivery (CI/CD), a professional practice you can start learning today.
Key Benefits of GitHub Actions (Especially for Beginners)
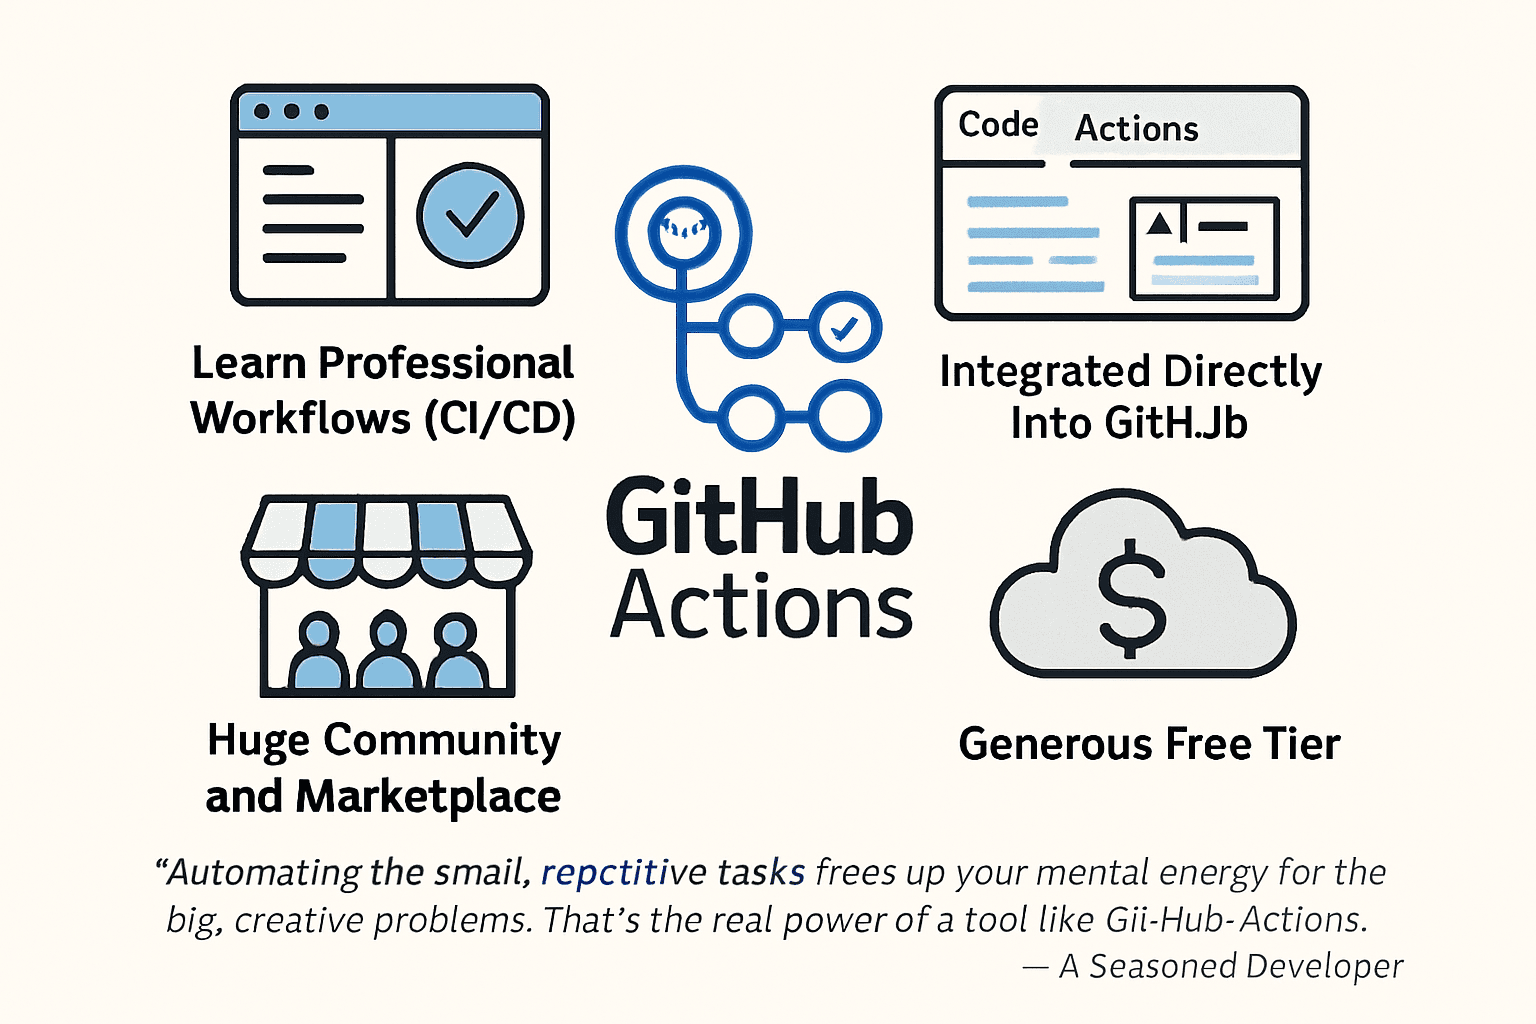
Beyond just being a cool piece of tech, adopting GitHub Actions early in your coding journey offers tangible benefits that can accelerate your learning and make you a more effective developer. It’s not just for large, complex enterprise projects; it’s a tool that provides immense value to individual learners, students, and open-source contributors. Let’s explore why you should care about it right now.
-
Learn Professional Workflows (CI/CD): The most significant benefit is that it introduces you to the world of Continuous Integration and Continuous Delivery (CI/CD). These are standard practices in the software industry. By learning to automate your tests and builds, you’re gaining hands-on experience with skills that are highly valued in the job market. You’re not just learning to code; you’re learning how to ship code professionally.
-
Integrated Directly into GitHub: You don’t need a separate account, a different website, or a complex integration process. It’s all right there in the “Actions” tab of your repository. This seamless experience lowers the barrier to entry significantly. You can view your code, pull requests, and automation logs all in one place, creating a smooth and intuitive workflow.
-
Huge Community and Marketplace: You don’t have to build everything from scratch. The GitHub Marketplace is a treasure trove of pre-built actions created by the community and major tech companies. Need to set up a specific version of Python or Node.js? There’s an action for that. Want to deploy your website to a cloud provider? There’s an action for that, too. This plug-and-play nature makes it incredibly powerful.
-
Generous Free Tier: For public repositories, GitHub Actions is completely free. For private projects, you get a generous number of free minutes each month. This means you can learn, experiment, and automate your personal projects without ever paying a dime. It removes the financial barrier, making it one of the most accessible automation tools available.
“Automating the small, repetitive tasks frees up your mental energy for the big, creative problems. That’s the real power of a tool like GitHub Actions.” — A Seasoned Developer
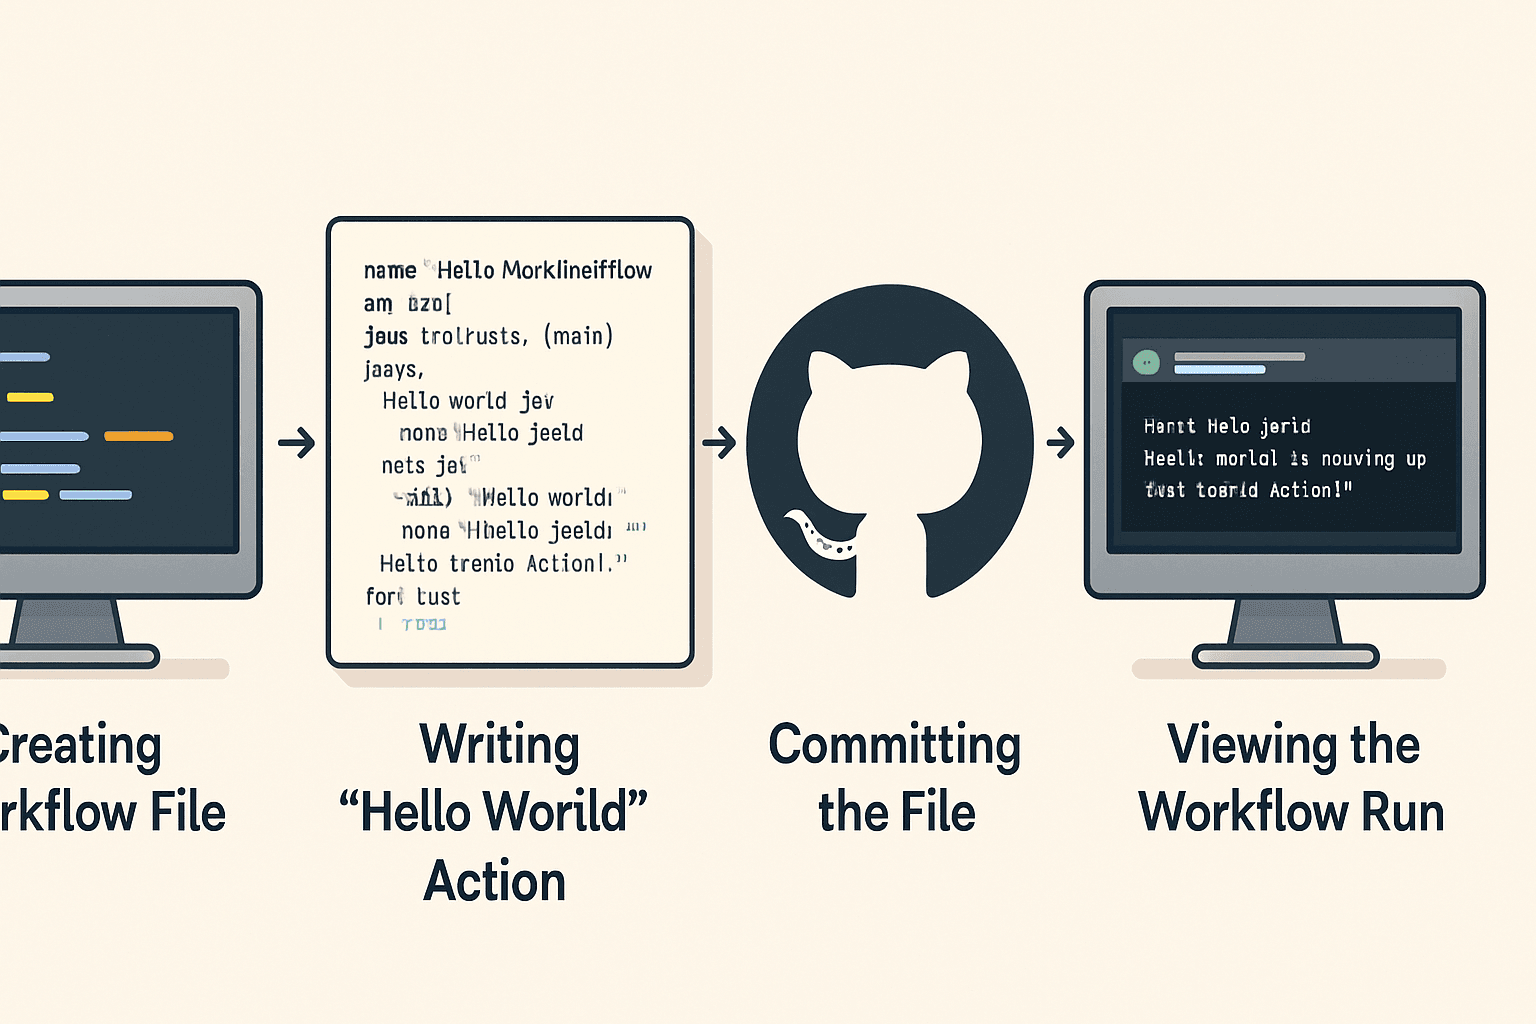
Your First ‘Hello World’: A Step-by-Step Guide to Your First Workflow
Theory is great, but nothing builds confidence like seeing it work with your own eyes. Let’s create your very first GitHub Actions workflow. The goal is simple: when we push code to our repository, we want the action to print “Hello, world!” in the logs. This exercise will prove that you can get a real, working automation pipeline running in just a few minutes. It’s the perfect first step to demystify the process and achieve that desired outcome: a successful first run. Don’t worry, we’ll walk through every single step together. All you need is a GitHub account and a repository to work in. If you don’t have one, you can create a new, empty repository for this experiment.
Step 1: Creating Your First Workflow File in GitHub
GitHub Actions looks for workflow files in a very specific location inside your repository: a folder named .github/workflows. The dot at the beginning of the .github folder name is important—it signifies a hidden directory in many systems, but it’s just a name here.
In your repository on GitHub.com, click on the “Actions” tab. GitHub might suggest some starter workflows. For now, you can ignore those and click the link to “set up a workflow yourself.” This will create a new file for you at the correct location: .github/workflows/main.yml.
Step 2: Understanding the Basic YAML Structure (It’s Simpler Than It Looks)
Workflow files are written in a language called YAML (which stands for “YAML Ain’t Markup Language”). It might look strange at first, but it’s just a simple way to structure data using indentation. Think of it as creating an outline with bullet points. The two most important rules are: use spaces, not tabs, for indentation, and the indentation level defines the structure.
Your new file will have some boilerplate code. You can delete it all and we’ll start fresh. Every workflow needs a few key pieces:
-
name: The name of your workflow, which shows up in the Actions tab. -
on: The event that triggers the workflow. We’ll usepush. -
jobs: A container for all the work to be done.
This structure tells GitHub: “Here is a workflow named X, please run it whenever Y happens.”
Step 3: Writing Your ‘Hello World’ Action
Now, let’s write the actual workflow. Inside the file you created (.github/workflows/main.yml), paste the following code. The indentation is critical, so make sure it looks exactly like this:
name: Hello World Workflow

on:
  push:
    branches: [ main ]

jobs:
  hello-world-job:
    runs-on: ubuntu-latest
    steps:
      - name: Print Hello World
        run: echo "Hello, world! I'm running my first GitHub Action!"
Let’s quickly break this down:
-
name: Hello World Workflow: We’re naming our workflow. -
on: [push]: This workflow will run every time youpushcode to themainbranch. -
jobs:: We’re defining the work to be done. -
hello-world-job:: We’ve created a single job with this name. -
runs-on: ubuntu-latest: This tells GitHub to use a fresh Linux machine (runner) for this job. -
steps:: Here are the instructions for the job. -
run: echo "...": This is our only step. It uses theruncommand to execute a simple shell command,echo, which just prints text.
Step 4: Committing the File and Watching the Magic Happen
Once you’ve pasted the code into the editor on GitHub, find the “Commit changes” button on the right side. You can leave the default commit message (“Create main.yml”) and commit the file directly to the main branch.
The moment you commit this file, you’ve performed a push event! This will trigger the workflow you just created. Click on the “Actions” tab again. You will see your “Hello World Workflow” listed, likely with a yellow circle indicating it’s in progress. Click on it, and then click on the hello-world-job to see the live logs. In a few seconds, you’ll see your “Print Hello World” step, and inside, the message: “Hello, world! I’m running my first GitHub Action!”
GitHub Actions Pricing: What You Need to Know
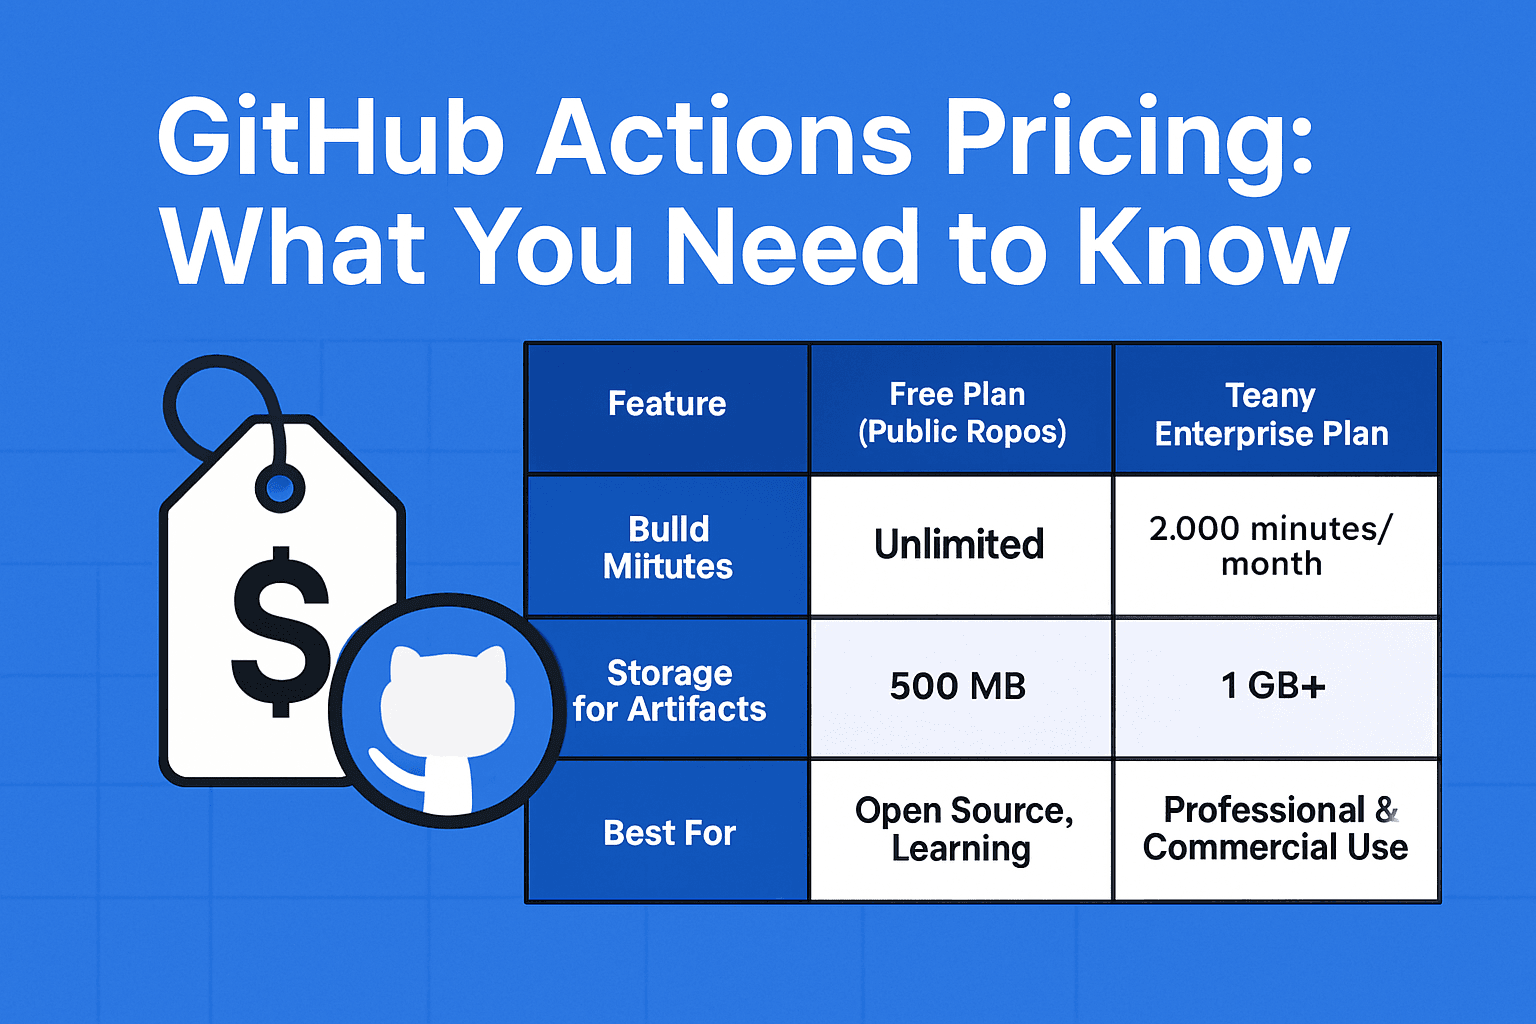
One of the most common questions for beginners is, “How much does this cost?” It’s a valid concern, especially for students or those on a budget. The good news is that GitHub has structured its pricing to be incredibly friendly for learning and open-source development. This transparency is key to building trust; you can experiment freely without worrying about surprise bills. Let’s break down the pricing model so you know exactly what to expect. The core of the pricing revolves around “build minutes,” which is the amount of time your jobs are running on GitHub’s runners.
The Free Tier: Generous for Learning and Public Projects
For any public repository, GitHub Actions is completely free. You get unlimited build minutes. This is GitHub’s way of supporting the open-source community, and it’s a massive benefit for anyone learning to code. You can create complex, multi-stage workflows for your public projects without ever hitting a paywall.
For private repositories, every GitHub account (even free accounts) gets a monthly allowance of free build minutes and storage. This is more than enough for most personal projects, experiments, and small team collaborations. It’s designed so you can learn and build without financial pressure.
Paid Plans for Private Repositories: A Quick Overview
If you’re working on a larger private project or with a team that has high automation needs, you might eventually use up your free monthly minutes. In that case, you’d move to a paid plan like GitHub Team or Enterprise. These plans offer significantly more build minutes and storage for private repositories. Billing is typically pay-as-you-go, so you only pay for the extra minutes you use beyond your included allowance. For beginners, the key takeaway is that you are highly unlikely to need a paid plan for a long time.
|
Feature |
Free Plan (Public Repos) |
Free Plan (Private Repos) |
Team/Enterprise Plan |
|---|---|---|---|
|
Build Minutes |
Unlimited |
2,000 minutes/month |
3,000+ minutes/month |
|
Storage for Artifacts |
Unlimited |
500 MB |
1 GB+ |
|
Best For |
Open Source, Learning |
Personal Projects, Small Teams |
Professional & Commercial Use |
GitHub Actions FAQ for Beginners
Is GitHub Actions the same as Git?
No. Git is the version control system used to track changes in your code. GitHub is the web platform that hosts your Git repositories. GitHub Actions is a feature within GitHub that allows you to automate tasks related to your code.
Do I need to know how to code to use GitHub Actions?
It helps, but you don’t need to be an expert. Workflows are written in YAML, which is a configuration language, not a programming language. Many simple workflows just run basic command-line tools. Using the Marketplace for pre-built actions also reduces the amount of code you need to write yourself.
Can I run GitHub Actions on my own computer?
Yes! While GitHub provides hosted “runners” in the cloud, you can also install a “self-hosted runner” on your own machine or server. This is a more advanced topic, but it gives you full control over the hardware and environment your automation runs in.
Conclusion: Your Next Steps in Automation

You’ve taken the first and most important step: you’ve pulled back the curtain on GitHub Actions. It’s no longer an intimidating, abstract concept. You now understand the core components—workflows, events, jobs, and runners—and you’ve seen firsthand how simple it can be to create your first automated task. By completing the ‘Hello World’ example, you’ve proven that this powerful tool is well within your reach. Your next step is to think about the repetitive tasks in your own projects. Do you manually run tests? Do you forget to check code formatting? Try automating one of those small tasks next.